This tutorial will show you a quick tip that can help spark a few ideas for your photographs.
Step 1: Find two suitable photographs that you would like to merge together. Many times, you may need to take a photograph of something and extract out only the parts that you need.
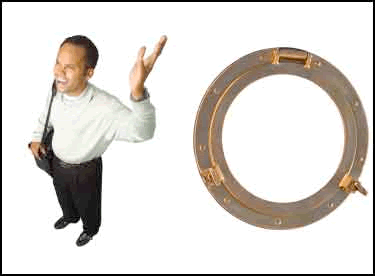
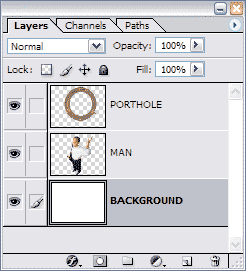
Step 2: With these two photographs, I have extracted the porthole from its background as well as the man and placed them on two separate layers in Photoshop.
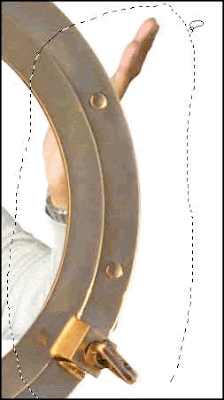
Step 3: Once the two objects are on their own layers, So made a selection with the Lasso Tool of the portion of the man that I wanted to extend out from beyond the porthole.
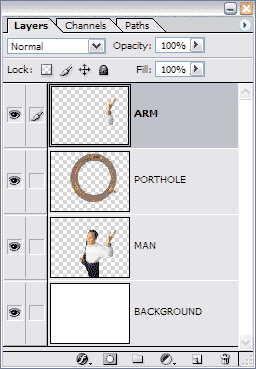
Step 4: Next click on the MAN layer to be sure it is the active one. Then chose Layer => New => Layer Via Copy (Ctrl + J). This copied the selection of the active layer to a new layer above the existing one. I then named this layer ARM to keep things tidy.
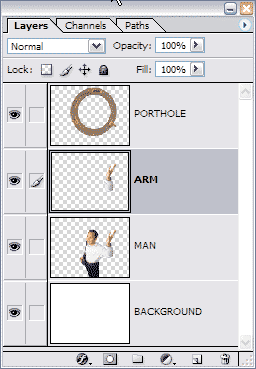
Step 5: From there, I dragged the new ARM layer above the PORTHOLE layer.
Step 6: My effect is almost complete but it lacks a certain bit of realism. Maybe the fact that this man with a briefcase has no reason to be waving out a porthole bothers you. Its probably not very realistic but I'm talking about another type of realism. Notice how his arm is not casting any shadow over the porthole. In real life we would see a small shadow at least.
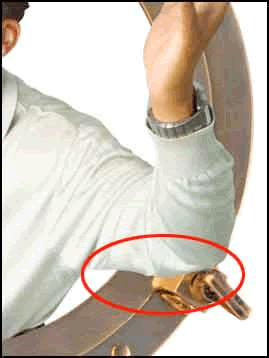
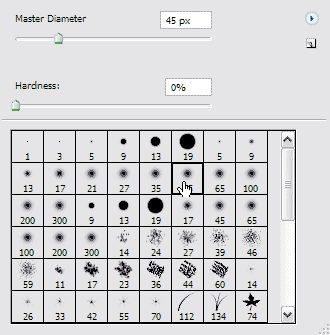
Step 7: To fix this, I chose the Brush Tool and picked a larger soft edged brush.
Step 8: Then pressed D to set Black as the foreground color. I created a new layer above the PORTHOLE layer but below the ARM layer named SHADOW. Then, with the brush I painted a small black line just outside the bottom of the arm.
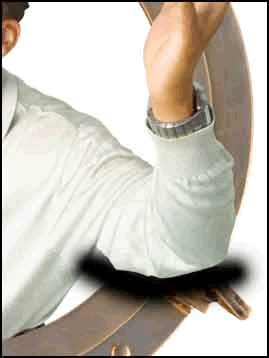
Step 9: OK, its does not look just right yet though. I was not very careful when painting this black brush stroke so it protrudes beyond the porthole outline. However, I did not need to be careful. Photoshop has a seldom used feature called clipping groups. In a nutshell, a clipping group will allow me to clip the shadow to the outline of the porthole. So, I clicked once on the shadow layer and chose Layer => Create Clipping Mask (Ctrl + G). This grouped the shadow with the layer underneath it (porthole). Now it looks better.
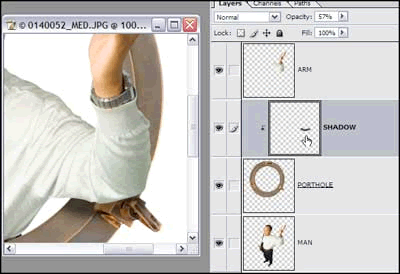
Step 10: To finish it off I lowered the opacity of the shadow layer a bit, removed the portion of the man from the waste down and added some background color.

No comments:
Post a Comment