Thursday, January 22, 2009

Merging of Photographs

This tutorial will show you a quick tip that can help spark a few ideas for your photographs.

Step 1: Find two suitable photographs that you would like to merge together. Many times, you may need to take a photograph of something and extract out only the parts that you need.

Step 2: With these two photographs, I have extracted the porthole from its background as well as the man and placed them on two separate layers in Photoshop.

Step 3: Once the two objects are on their own layers, So made a selection with the Lasso Tool of the portion of the man that I wanted to extend out from beyond the porthole.

Step 4: Next click on the MAN layer to be sure it is the active one. Then chose Layer => New => Layer Via Copy (Ctrl + J). This copied the selection of the active layer to a new layer above the existing one. I then named this layer ARM to keep things tidy.

Step 5: From there, I dragged the new ARM layer above the PORTHOLE layer.

Step 6: My effect is almost complete but it lacks a certain bit of realism. Maybe the fact that this man with a briefcase has no reason to be waving out a porthole bothers you. Its probably not very realistic but I'm talking about another type of realism. Notice how his arm is not casting any shadow over the porthole. In real life we would see a small shadow at least.

Step 7: To fix this, I chose the Brush Tool and picked a larger soft edged brush.

Step 8: Then pressed D to set Black as the foreground color. I created a new layer above the PORTHOLE layer but below the ARM layer named SHADOW. Then, with the brush I painted a small black line just outside the bottom of the arm.

Step 9: OK, its does not look just right yet though. I was not very careful when painting this black brush stroke so it protrudes beyond the porthole outline. However, I did not need to be careful. Photoshop has a seldom used feature called clipping groups. In a nutshell, a clipping group will allow me to clip the shadow to the outline of the porthole. So, I clicked once on the shadow layer and chose Layer => Create Clipping Mask (Ctrl + G). This grouped the shadow with the layer underneath it (porthole). Now it looks better.

Step 10: To finish it off I lowered the opacity of the shadow layer a bit, removed the portion of the man from the waste down and added some background color.

illustration vector effec

I am going to show you a quick and easy way to convert a photo into a illustration vector effect. Here we go!

Step 1: First I will start with an image.


Step 2:Duplicate the Background layer.


Step 3: Now apply the Cutout filter (Filter => Artistic => Cutout). On the left side the amount of detail in the vector can be controlled by adjusting the Number of Levels, Edge Simplicity and Edge Fidelity sliders. For this example I am using 5 levels, with the Edge Simplicity set to 3 and Edge Fidelity set to 3. Click OK.


Step 4: You can trace the areas of color divided by the Cutout filter with the Poster Edges Filter. For this example the Edge Thickness is set to 2, Edge Intensity to 1 and Posterization to 4. Click OK.


Step 5: The color can be changed subtly with a Photo Filter adjustment layer.


Step 6: And finally, to add to the ‘colored’ effect, a Brightness/Contrast adjustment layer will help take away the natural highlights/shadows even more.


Step 7: Here is my final vector image:

Converting a photograph into a sketch or painting

Converting a photograph into a sketch or painting. However, We will show you a few tricks on how to expand this effect to meet your needs along the way.

Step 1: First, find a suitable photograph.

Step 2: Duplicate the sunflower photograph layer (Ctrl/Cmd + J). Then desaturate the duplicate (Image > Adjustments > Desaturate or Ctrl/Cmd + Shift + U). Name this layer DESATURATE. Then duplicate the desaturate layer and invert the new one (Ctrl/Cmd + I). Name this layer INVERT. You are layers palette should now look like this.

At this point, your image should look similar to this one.

Step 3: Change the blending mode of the INVERT layer to Color Dodge. You should now not be able to see many details in your image.

Step 4:Make the INVERT layer active by clicking once on it and choose Filter > Blur > Gaussian Blur. Enter a setting between 2-3 pixels. At this point, you could stop here if you chose, and you would have a great pencil sketched look to your image.

Step 5: If you are moving on then click once on the INVERT layer and merge it with the DESATURATE layer by pressing Ctrl/Cmd + E. Then change the Blend mode of this new layer to Luminosity.

Step 6: Great, almost done. Finally, you have a few choices of filters to run on this layer. Chose Filter > Artistic > Fresco with the following settings.


Step 7:The image looks great but there is one more trick. Often the filters we ran on the image gave me too strong of a painterly effect. To weaken it, right after you run the filter choose Edit > Fade (Your filter Name). Enter the following settings into the dialog box and click OK.


Now its looks like a great Effect!


variation on metallic/silver text

I am going to show you a quick and easy variation on metallic/silver text.


Step 1: To begin, create a new image with the following attributes.


Step 2: Create a new layer and then select the Type Mask tool. I Chose Stencil Std font with 90 pts in size.


Step 3: Open the Layer Styles for the filled type layer. First, select Inner Glow and apply the following settings:


Step 4: Now select Bevel and Emboss with the following settings:


Step 5: Set Gradient Overlay:


Step 6: Inner Shadow:


Step 6: Go back to Bevel and Emboss. Click on the Contour window and create a contour like the one seen below.


Click Ok.

create falling snow or rain

Here is a multi use technique that you can use to create falling snow or rain:


Use the Noise and Crystallize filters to produce snow or rain.

  1. Add a new layer to your image by clicking the New Layer button in the Layers palette. Still in the Layers palette, change the layer’s blending mode from Normal to Screen.
    Because this technique uses a separate layer, you can consider it to be nondestructive (you can always delete the layer later), so you do not have to work on a copy of your image. But it is always a good idea to work on a copy, just in case.

  2. Choose Edit => Fill to fill the layer with black. Because the layer’s blending mode is Screen, you won’t see the black fill.

  3. Add Noise to the layer. Use the Noise => Add Noise filter to add some variation to the layer. Use Amount: 20%, Distribution: Gaussian, and mark the Monochromatic check box.

  4. Enlarge the noise with the Crystallize filter. Use the Pixelate => Crystallize filter to turn the little noise into larger chunks. Use Cell Size: 3 for small snow or rain; try 7 or 10 for larger flakes. You can also apply a slight Gaussian Blur to increase the size.

  5. Sharpen the edges. Using the Unsharp Mask filter, sharpen until the snowflakes have distinct edges. Use Amount: 100%, Radius: 2, Threshold: 0. When you create rain, use Amount: 40%.

  6. Apply a Levels adjustment.

In the Levels dialog box, drag the middle slider about halfway to the left, then drag the left slider slowly to the right until you see the amount of snow or rain that you want. Afterward, if desired, you can apply the Motion Blur filter to the falling snow/rain. And, of course, you can add a layer mask to control visibility.

nice feeling of speed

In this Photoshop Tutorial we will show you give your type a nice feeling of speed.

Step One: Open a new document, make the background black and type your letters in white. Now press Ctrl+E to reduce the layers to the background.


Step Two: Now go filters => Blur => Gaussian Blur and set it between 1.0 an 1.5.


Step Three: Next we need Filters => Stylize => Solarize. Your text looks like this!


Step Four: Then use image => Adjustment => Channel Mixer and set the values like below.


After putting the values in Channel Mixer, your text looks like!


Step Five: Now go Filters => Distort => Polar Coordinates and choose the lower -Polar to Rectangular- radio button.


Step Six: Now go to Image => Rotate Canvas => 90°CCW. Next we apply Filters => Stylize => Wind - from left -you may use it two times; depending on your image size.


Step Seven: Then go to image-rotate canvas 90°CW. Now go again Filters => Distort => Polar Coordinates and this time choose the upper -Rectangular to Polar- radio button. And Your Speed Type Text Looks like a great effect!

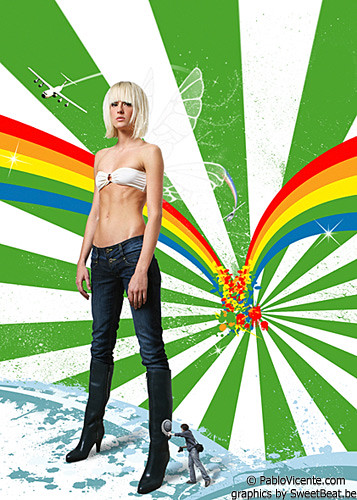
how he got the rainbow in the photo

julie,model,fashion,graphic design,sweetbeat,graphic,photoshop,design,rainbow,tutorial,photos,graphics,rainbows,professional

Bram from Sweetbeat.be tells you how he got the rainbow in the photo above using photoshop :

- Open new document 20×20cm.
- Make a new layer and select it.

- Select the pen tool en draw a bowed line.Make sure when you have the pen tool selected to have the paths icon selected and not shape layers or fill pixels
- I select the brush tool and on the top right-end corner of the window I open the brush menu (brushes).

- Select a hard basic brush of 28px and at the lower part of the window you put spacing on 1%.

photoshop,tutorial,graphic,design,sweetbeat

- On the top left-end corner in same the window I choose ” Shape dynamics “.
- I ensure that the size jitter, angle jitter, roundness jitter stands on 0%.

- At size jitter I put the control on fade, give in the number 400 and choose 10% minimum diameter (dependent of the size of the document you must play with this).

photoshop,tutorial,graphic,design,sweetbeat

- Now I select the pen tool.
- Click rightbutton and choose stroke path.